RECENT POSTS

10 August 2015

BASIL PESTO - inspiration


How to Make Fresh Pesto? It is not so difficult, when I made Pesto for the first time, it was delicious. Actually, every time I make different pesto, sometimes I add garlic, and sometimes sunflower seeds instead of pine nuts. This time, my pesto was created with walnuts and basil from my garden on the window. I do not know how it will have to traditional pesto, but I know one thing is delicious.


My recipes for pesto can also be found here
  

SHARE:

28 January 2015

Stuffed Peppers with Buckwheat .

These stuffed peppers recipe is very delicious,make a great healthy lunch or dinner. This recipe really is a filling meal and you don't really need anything else on your plate.

The veggies in this recipe are very versatile so if you don’t like something, feel free to leave it out. Mushrooms, carrot, onion, green/orange/yellow bell peppers could all be welcome additions.


Ingredients:

1 chicken breast
2 cloves garlic, chopped
1/2 onion, chopped
1 small carrot, peeled and shredded
1 tablespoon coconut oil
paprika, pepper, salt, marjoram to taste
100 grams of buckwheat
3 large sweet bell peppers
1 large sweet bell chopped

Directions:

 In a medium heavy bottom pot 1 Tbsp. of oil over medium heat; add onions, garlic and carrots sauté until softened for about 3-4 minutes. Add chicken and cook for another 3-4 minutes.
Add 1 large sweet bell chopped,other veggies and buckwheat (cooked). Place all empty  bell peppers in a baking dish. Next fill up to the brim with your buckwheat mixture. Place on your lid drizzle with a little coco oil and place into a pre heated oven at 180C for 15-30 minutes or until bell peppers are cooked and a little golden on the edges.

Enjoy!

SHARE:

24 July 2014

Chicken and Peaches Recipe

In the summer I don't like to spend too much time in the kitchen as soon as this summer we have. I like a quick dish that looks pretty good. My husband spends more time in the kitchen - he likes :-) I don't protest  ;-)

Ingredients:
2 chicken breasts
0.5 teaspoon ground ginger
0.5 teaspoon ground cloves
2 tablespoons fresh lemon juice

1 tablespoon soy sauce
1 cup canned sliced peaches together with juice 
0.5 cup canned corn
0.5 cup canned carrots
black pepper, parsley and sea salt to taste
0.5 tablespoon coconut oil

4 chicken breasts
Fry the chicken in the pan, until golden, but not longer than 5 minutes. Then add the other ingredients and cover and simmer about 20 minutes. That's all. The best served with rice.

Quick, tasty and left time for pleasant reading - very inspiring.


SHARE:

7 February 2014

Guest Post: Making Creating Sharing a Recipe & Diy

Thank you Joanna for having me on your blog to guest post here at Be Creative Mommy. Hello, Theresa here from DearCreatives.com I am excited to share some sewing for baby, a few projects and a recipe I've been worked on. Then I'll leave you with a diy project. I hope everyone enjoys this post today! First up a little sewing for baby; 


Baby Booties with mushroom fabric_moon-booties_Theresa Huse 2014


My latest sewing project were these little baby booties. They are called Moon booties. The project was an easy to sew one from a book called Sweet Booties. I will be sharing a step by step tutorial on how to make them from the pattern in the book on my blog soon. This will include tips on different use of fabrics for the pattern to sewing tips.


Baby Burping Rags

From the same baby book I made these lovely burping towels. They are the easiest project to do. All straight stitching, leave one side open, trim up corners and turn inside out. You can find this on the blog right now. 

 Olive oil being poured over salmon in a baking dish_DearCreatives.com

My favorite recipe I have made recently was this Slow baked Salmon recipe. It is easily prepared and would make a wonderful Valentines Dinner if you stay home with your family or just for two! Lastly I am leaving you with this easy Diy for your place settings! A project you can make yourself!


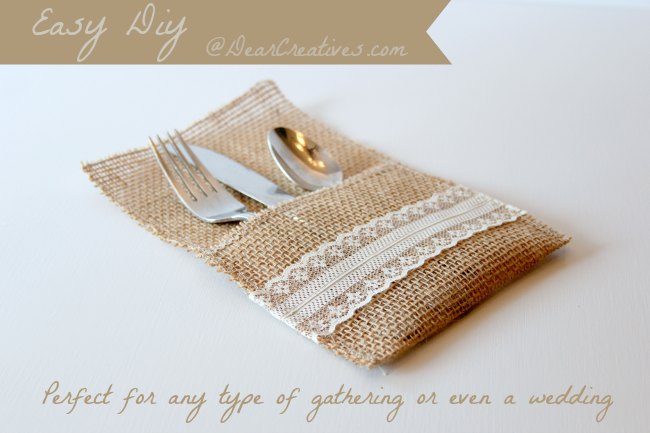
Burlap Utensil Holder_ Diy _Fork_Knife_Spoon_ Theresa Huse 2013


Supplies you will need for this diy:

  • burlap (woven or any type will do) Cut to: Total Size: 6 inches wide x 13 3/4" for each one
  • thread (wheat or light color)
  • scissors
  • cardboard or poster board to make template (optional)
  • ruler
  • straight pins
  • lace (size about 1-1/2")
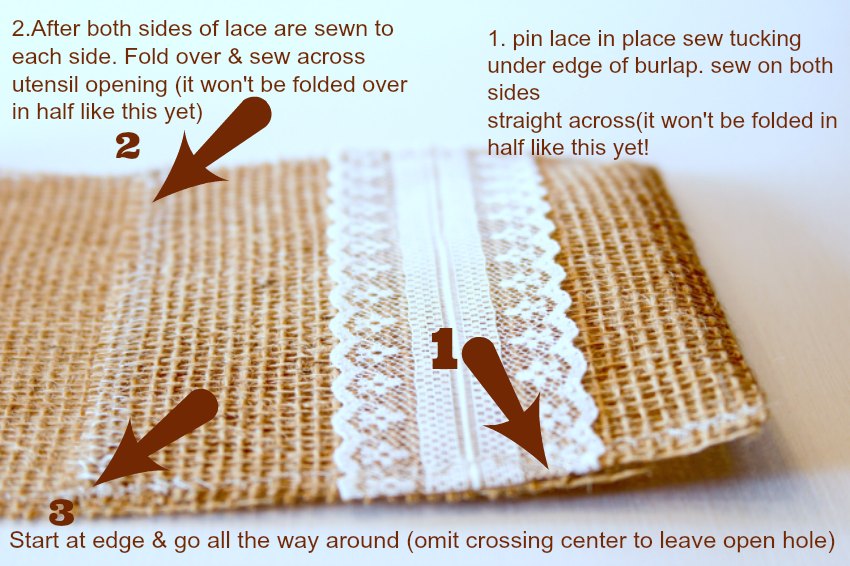
#1. First thing is either make out a template or just measure & cut one using it as a template for the rest. The measurements I used leave enough room to add a napkin into them. Total Size: 6 inches wide x 13 3/4" for each one you want to make. I made 8 so I cut this size 8 times. #2. Next cut your lace pieces about 6 1/2" for each one. (OR) You can put lace into place folding lace across then tuck under edge pin & cut to size.To find placement just fold up your burlap fabric about 4-3/4" (but, do not sew it yet) I placed mine exactly one inch from where bottom was going to be & a little over 1-1/2 inch from where #2 is in the photograph & opening of utensil holder pocket is. As you see you fold up your 6 x 12- 3/4 " fabric 4-1/2" to create the pocket. All sewing prior to third step is done without folding for the pocket as shown in image below. (envision your total size burlap flat unfolded to do first steps, hope that makes sense)


Step by Step how to make burlap utensil holders_Theresa Huse 2013

#3. Once you do steps one & two you fold up burlap & pin at each side in place start at one corner & go the entire way around. It isn't necessary to sew across the bottom, sew along one side, across top & down the other side like it's a u shape. I did this so the burlap edges wouldn't unravel & to make the fold of pocket. 


Lace_Burlap_ Closeup_ Theresa Huse 2013

When your sewing the lace onto burlap you sew across the side edges (on each side) where you will sew around a final time. If you have questions just ask & I'll try to answer them. 


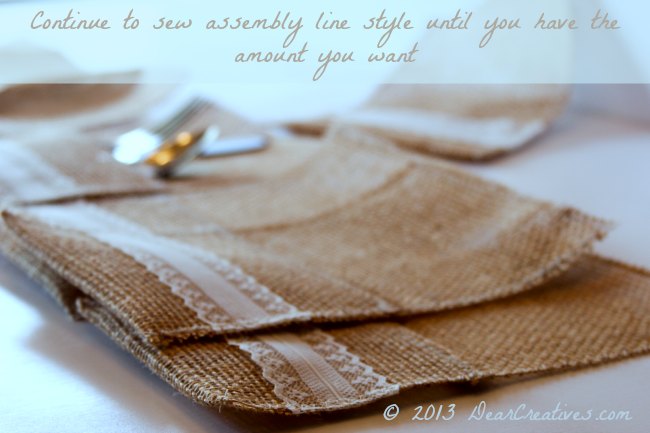
set of burlap and lace utensil holders_Theresa Huse 2013

Enjoy making them! 


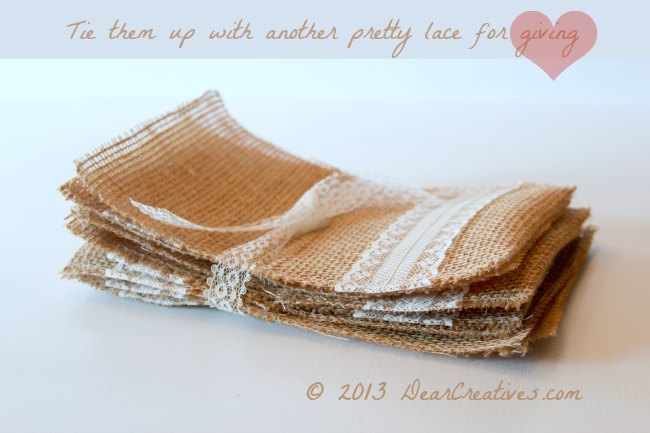
Burlap Utensil Holders_tied up pretty gift diy idea_Theresa Huse 2013

Thanks Joanna for letting me share with your readers today! I hope you drop by to see the other crafts, diy, recipes and photography on the blog. Again you can find me at: DearCreatives.com All my best, Theresa


Thank you for a wonderful post and I hope that you will be my guest again in the future.


https://www.etsy.com/uk/shop/ArtJPabelG


SHARE:
© Be Creative Mummy / UK lifestyle Blog / Crafts | All rights reserved.
Blogger Templates by pipdig